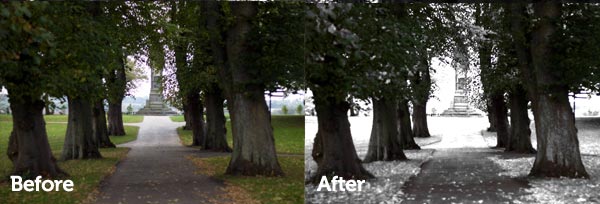
There is no debating the power of Photoshop when it comes to photo manipulation and enhancement. Many alterations to photos can be time consuming complicated and delicate work yet adding realistic snow to a landscape photography is actually particularly easy.
This quick guide will take you through the steps of adding winter to any landscape photo, but please note the process works better on bright clear landscapes rather than darker low contrast photos so chose a good photo from your library.


1. Load the Photo into Photoshop
Not much to explain for this step.
2. Add a Channel Mixer
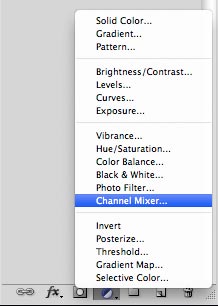
At the bottom of the layers control you will see a small circle that is half black half white (fourth icon across). Click this and add a new Channel Mixer Layer.
A new layer will be added to the top of the layers window.
Ensuring you have selected the Channel Mixer Layer set the layer to “lighten” at the top of the layers window.

Now we turn to actually start controlling the Channel Mix and adding a touch of frost and snow to our landscape photograph.
3. Channel Mix
If the Channel Mix window isn’t currently on screen double click the Channel Mixer layer.

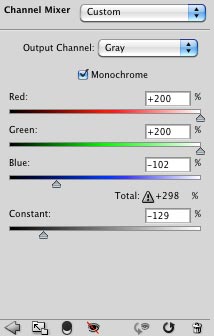
This is where the fun begins. First set the Mix to “Monochrome” by clicking the monochrome tick box. This will change the Mix Colour from Red to Grey.
a) Set both the Red and Green levels to Max(200%)
Your photograph should look very white and over exposed, if it looks very red or green you have forgotten to click the monochrome button. Now it is time to play with what I call the “Snow Controls”.
Reduce both the Blue and Contrast levels to achieve the level of winter you desire.
I find I am continually increasing and decreasing either the Blue or contrast to create the right balance.
I generally start with the blue at -100 and tweak either side and the higher the blue level the more colour you are going to have in the non frosted areas.

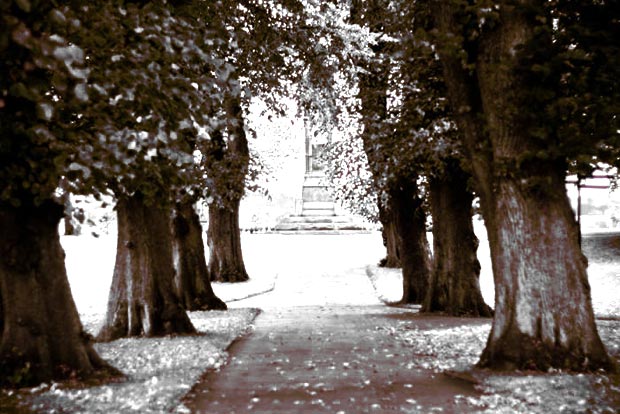
It is amazing just how effective this technique is for adding a touch of winter to landscape photos, making it an ideal process for next year’s Christmas card.
Hmm, looks like a monochromatic summer-picture to me 😉